Difference between revisions of "Recruitment"
From Unofficial Fantasica Wiki
RinMarceline (Talk | contribs) (→32px List of Recruitable Monsters 32px: Added Algeria through Placer) |
m (→32px List of Recruitable Monsters 32px: Swapping to use Recruit Row template) |
||
| Line 68: | Line 68: | ||
All monsters listed below can be recruited during any recruitment event. | All monsters listed below can be recruited during any recruitment event. | ||
| − | {| | + | {{Recruit_Header}} |
| + | {{Recruit_Row|Nine Tailed Fox}} | ||
| + | {{Recruit_Row|Succubus}} | ||
| + | {{Recruit_Row|Mermaid}} | ||
| + | {{Recruit_Row|Stray Cat}} | ||
| + | {{Recruit_Row|Harpy}} | ||
| + | {{Recruit_Row|Faith}} | ||
| + | {{Recruit_Row|Erhard}} | ||
| + | {{Recruit_Row|Agnes}} | ||
| + | {{Recruit_Row|Blad}} | ||
| + | {{Recruit_Row|Charl}} | ||
| + | {{Recruit_Row|Dorothy}} | ||
|- | |- | ||
| − | + | | 6{{*}} || [[Image:Black_Dragon.gif]] || [[Image:Black_Dragon_icon.png]]<br>[[Black Dragon]] || [[Image:Georgios.gif]] || [[Image:Georgios_icon.png]]<br>[[Georgios]] || [[Black Dragon Castle]]<br>Rank Reward + [[Recruitment]]<br>1st - 10th | |
| − | + | {{Recruit_Row|Minerva}} | |
| − | + | {{Recruit_Row|Laura}} | |
| − | + | {{Recruit_Row|Sonia}} | |
| − | + | {{Recruit_Row|Benedetta}} | |
| − | | 6{{*}} || [[Image: | + | {{Recruit_Row|Luce}} |
| − | + | {{Recruit_Row|Tullia}} | |
| − | + | {{Recruit_Row|Vampiress}} | |
| − | + | {{Recruit_Row|Werewolf}} | |
| − | + | {{Recruit_Row|Frankenstein}} | |
| − | + | {{Recruit_Row|Ghost (Halloween)}} | |
| − | + | {{Recruit_Row|Witch}} | |
| − | + | {{Recruit_Row|Hippolyte}} | |
| − | + | {{Recruit_Row|Penthesilea}} | |
| − | + | {{Recruit_Row|Antiope}} | |
| − | + | {{Recruit_Row|Hera}} | |
| − | + | {{Recruit_Row|Melanippe}} | |
| − | + | {{Recruit_Row|Otrere}} | |
| − | + | {{Recruit_Row|Ethelred}} | |
| − | + | {{Recruit_Row|Elizabeth}} | |
| − | + | {{Recruit_Row|Anne}} | |
| − | + | {{Recruit_Row|Henry}} | |
| − | + | {{Recruit_Row|Mary}} | |
| − | + | {{Recruit_Row|Loki}} | |
| − | + | {{Recruit_Row|Fenrir}} | |
| − | + | {{Recruit_Row|Sleipnir}} | |
| − | + | {{Recruit_Row|Garm}} | |
| − | + | {{Recruit_Row|Hraesvelgr}} | |
| − | + | {{Recruit_Row|Jormungand}} | |
| − | + | {{Recruit_Row|Grey}} | |
| − | + | {{Recruit_Row|Oliver}} | |
| − | + | {{Recruit_Row|Isabelle}} | |
| − | + | {{Recruit_Row|Constance}} | |
| − | + | {{Recruit_Row|Adele}} | |
| − | + | {{Recruit_Row|Hugues}} | |
| − | + | {{Recruit_Row|Margot}} | |
| − | + | {{Recruit_Row|Marjoram}} | |
| − | + | {{Recruit_Row|Agastache}} | |
| − | + | {{Recruit_Row|Bergamot}} | |
| − | + | {{Recruit_Row|Fennel}} | |
| − | + | {{Recruit_Row|Rosemary}} | |
| − | + | {{Recruit_Row|Lilith}} | |
| − | + | {{Recruit_Row|Eluit}} | |
| − | + | {{Recruit_Row|Noir}} | |
| − | + | {{Recruit_Row|Amarelo}} | |
| − | + | {{Recruit_Row|Viola}} | |
| − | + | {{Recruit_Row|Verde}} | |
| − | + | {{Recruit_Row|Neolith}} | |
| − | + | {{Recruit_Row|Azul}} | |
| − | + | {{Recruit_Row|Vermelho}} | |
| − | + | {{Recruit_Row|Blanche}} | |
| − | + | {{Recruit_Row|Pale}} | |
| − | + | {{Recruit_Row|Paars}} | |
| − | + | {{Recruit_Row|Merrow}} | |
| − | + | {{Recruit_Row|Vertex}} | |
| − | + | {{Recruit_Row|Dine}} | |
| − | + | {{Recruit_Row|Dauphin}} | |
| − | + | {{Recruit_Row|Risacca}} | |
| − | + | {{Recruit_Row|Algeria}} | |
| − | + | {{Recruit_Row|Trystis}} | |
| − | + | {{Recruit_Row|Amor}} | |
| − | + | {{Recruit_Row|Arger}} | |
| − | + | {{Recruit_Row|Haine}} | |
| − | + | {{Recruit_Row|Placer}} | |
| − | + | ||
| − | + | ||
| − | + | ||
| − | + | ||
| − | + | ||
| − | + | ||
| − | + | ||
| − | + | ||
| − | + | ||
| − | + | ||
| − | + | ||
| − | + | ||
| − | + | ||
| − | + | ||
| − | + | ||
| − | + | ||
| − | + | ||
| − | + | ||
| − | + | ||
| − | + | ||
| − | + | ||
| − | + | ||
| − | + | ||
| − | + | ||
| − | + | ||
| − | + | ||
| − | + | ||
| − | + | ||
| − | + | ||
| − | + | ||
| − | + | ||
| − | + | ||
| − | + | ||
| − | + | ||
| − | + | ||
| − | + | ||
| − | + | ||
| − | + | ||
| − | + | ||
| − | + | ||
| − | + | ||
| − | + | ||
| − | + | ||
| − | + | ||
| − | + | ||
| − | + | ||
| − | + | ||
| − | + | ||
| − | + | ||
| − | + | ||
| − | + | ||
| − | + | ||
| − | + | ||
| − | + | ||
| − | + | ||
| − | + | ||
| − | + | ||
| − | + | ||
| − | + | ||
| − | + | ||
| − | + | ||
| − | + | ||
| − | + | ||
| − | + | ||
| − | + | ||
| − | + | ||
| − | + | ||
| − | + | ||
| − | + | ||
| − | + | ||
| − | + | ||
| − | + | ||
| − | + | ||
| − | + | ||
| − | + | ||
| − | + | ||
| − | + | ||
| − | + | ||
| − | + | ||
| − | + | ||
| − | + | ||
| − | + | ||
| − | + | ||
| − | + | ||
| − | + | ||
| − | + | ||
| − | + | ||
| − | + | ||
| − | + | ||
| − | + | ||
| − | + | ||
| − | + | ||
|} | |} | ||
Revision as of 23:09, 3 November 2013
 | |
| Next Recruitment Period | |
|---|---|
| Dryad Monster Recruitment | |
| Start Date | 2013-10-31 |
| End Date | 2013-11-12 |
| Last Recruitment Period | |
| Sea Recruitment | |
| Start Date | 2013-09-11 |
| End Date | 2013-09-17 |
 | |
Odds of Successful Recruitment
| Rarity | Formula | % per SSS | SSS for 100%* (lvl1) |
|---|---|---|---|
| ★★★★★★★ | ? | ? | ? |
| ★★★★★★ | ROUND((4 * SSL + 0.1 * SSS) * (1 + LEVEL/300) / 2) | ? | ? |
| ★★★★★ | ROUND((4 * SSL + 0.12 * SSS) * (1 + LEVEL/300)) | 0.12% | 1000 SSS |
| ★★★★ | ROUND((33.2 * SSL + 0.833 * SSS) * (1 + LEVEL/300)) | 0.833% | 120 SSS |
* There is always a chance to fail, it is currently unknown what the cap is for max chance.
| Message | Odds Range* |
|---|---|
| I have little faith your offering will be successful. | 0 to 9% |
| Hmm, improbable, but not impossible. | 10% to 24% |
| Well, we can always hope for the best. | 25% to 39% |
| Who knows? Your guess is as good as mine! | 40% to 59% |
| I have a good feeling about this. | 60% to 79% |
| I think our odds for success are extremely high. | 80% to 100% |
- The odds range is a guesstimate.
- 100% odds are not possible; there is always a small chance to fail.
- The above odds ranges may vary depending on the rarity of the unit
Soul Stone Farming
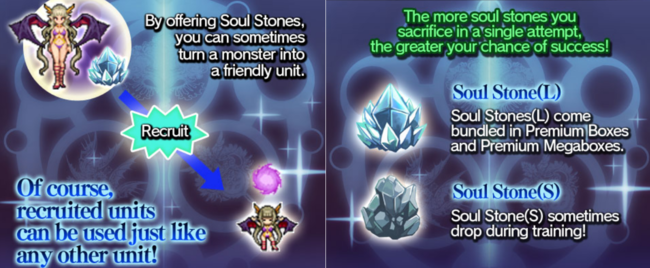
![]() Large stones can only be obtained from purchasing boxes or as rewards in events.
Large stones can only be obtained from purchasing boxes or as rewards in events.
![]() Small stones are obtained through training. The mission you run doesn't matter; missions with higher training point costs will yield more soul stones on average to compensate. You get around 1 stone per 80 training points on average.
Small stones are obtained through training. The mission you run doesn't matter; missions with higher training point costs will yield more soul stones on average to compensate. You get around 1 stone per 80 training points on average.
 List of Recruitable Monsters
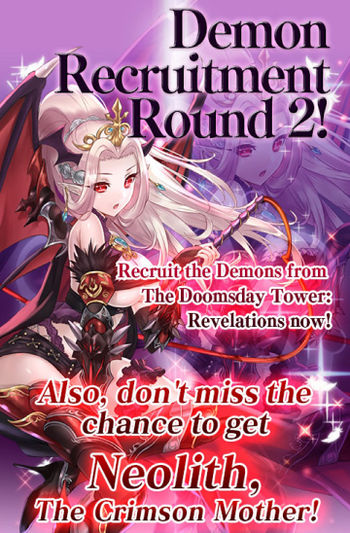
All monsters listed below can be recruited during any recruitment event.
| ★ | Monster | Unit | Source / Related Event | ||
|---|---|---|---|---|---|
| ★ | 
|
Nine Tailed Fox m |

|
Nine Tailed Fox |
|
| 6★ | 
|
Succubus m |

|
Succubus |
Standard Card Packs + Recruitment |
| 4★ | 
|
Mermaid m |

|
Mermaid |
Artifacts Set Reward + Recruitment |
| ★ | 
|
Stray Cat m |

|
Stray Cat |
|
| 3★ | 
|
Harpy m |

|
Harpy |
Standard Card Packs + Recruitment |
| 6★ | 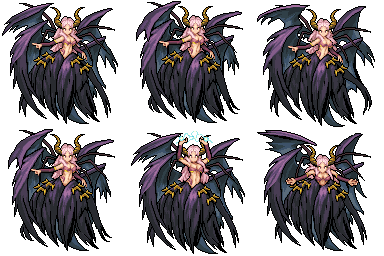
|
Faith m |

|
Faith |
Demon's Tower Rank Reward + Recruitment 1st - 50th Demon's Tower Revisited Group Rank Reward + Recruitment 1st - 3rd 65 units awarded |
| 5★ | 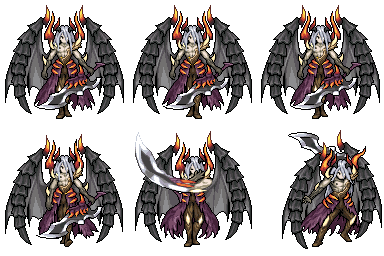
|
Erhard m |

|
Erhard |
Demon's Tower Rank Reward + Recruitment 1st - 200th Demon's Tower Revisited Group Rank Reward + Recruitment 1st - 500th 2,700 units awarded |
| 4★ | 
|
Agnes m |

|
Agnes |
Demon's Tower / Demon's Tower Revisited Random Lap 2+ Reward + Recruitment |
| 4★ | 
|
Blad m |

|
Blad |
Demon's Tower / Demon's Tower Revisited Random Lap 2+ Reward + Recruitment |
| 4★ | 
|
Charl m |

|
Charl |
Demon's Tower / Demon's Tower Revisited Random Lap 2+ Reward + Recruitment |
| 4★ | 
|
Dorothy m |

|
Dorothy |
Demon's Tower Random Lap 2+ Reward + Recruitment Demon's Tower Revisited Group Rank Reward + Recruitment 1st - 2,000th 10,000+ units awarded |
| 6★ | 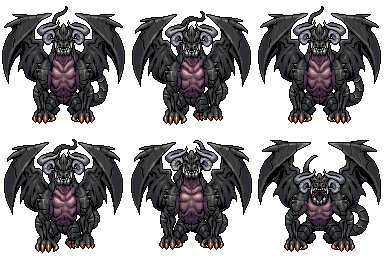 |
Black Dragon |
 |
Georgios |
Black Dragon Castle Rank Reward + Recruitment 1st - 10th |
| 6★ | 
|
Minerva m |

|
Minerva |
Black Dragon Castle Rank Reward + Recruitment 1st - 20th |
| 5★ | 
|
Laura m |

|
Laura |
Black Dragon Castle Rank Reward + Recruitment 1st - 200th |
| 5★ | 
|
Sonia m |

|
Sonia |
Black Dragon Castle Lap 1 Clear Reward + Recruitment The Ruins of Dragon Castle 20,000 BT Points Reward + Recruitment |
| 4★ | 
|
Benedetta m |

|
Benedetta |
Black Dragon Castle Random Lap Reward + Recruitment |
| 4★ | 
|
Luce m |

|
Luce |
Black Dragon Castle Random Lap 2+ Reward + Recruitment The Ruins of Dragon Castle 5,000 BT Points Reward + Recruitment |
| 4★ | 
|
Tullia m |

|
Tullia |
Black Dragon Castle Random Lap 2+ Reward + Recruitment |
| 6★ | 
|
Vampiress m |

|
Vampiress |
It Came From Halloween! Rank Reward + Recruitment 1st - 50th |
| 5★ | 
|
Werewolf m |

|
Werewolf |
It Came From Halloween! BT Rank Reward + Recruitment 1st - 25th 51st - 500th 475 units awarded |
| 4★ | 
|
Frankenstein m |

|
Frankenstein |
It Came From Halloween! BT Rank Reward + Recruitment 1st - 10th 51st - 200th 501st - 2,000th 1,710 units awarded |
| ★ | 
|
Ghost (Halloween) m |

|
Ghost (Halloween) |
|
| 4★ | 
|
Witch m |

|
Witch |
It Came From Halloween! BT Rank Reward + Recruitment 1st - 10th 51st - 100th 501st - 1,000th 2,001st - 4,000th 2,560 units awarded |
| 6★ | 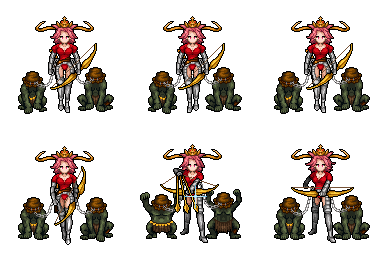
|
Hippolyte m |

|
Hippolyte |
Amazons of the Hidden Jungle Rank Reward + Recruitment 1st - 30th |
| 5★ | 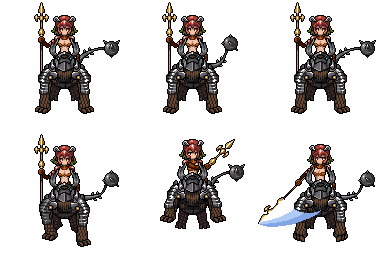
|
Penthesilea m |

|
Penthesilea |
Amazons of the Hidden Jungle Rank Reward + Recruitment 1st - 200th |
| 5★ | 
|
Antiope m |

|
Antiope |
Amazons of the Hidden Jungle Lap 1 Clear Reward + Recruitment |
| 4★ | 
|
Hera m |

|
Hera |
Amazons of the Hidden Jungle Random Lap 2+ Reward + Recruitment |
| 4★ | 
|
Melanippe m |

|
Melanippe |
Amazons of the Hidden Jungle Random Lap 2+ Reward + Recruitment |
| 4★ | 
|
Otrere m |

|
Otrere |
Amazons of the Hidden Jungle Random Lap 2+ Reward + Recruitment |
| 6★ | 
|
Ethelred m |

|
Ethelred |
Soul Hunters Rank Reward + Recruitment 1st - 15th |
| 5★ | 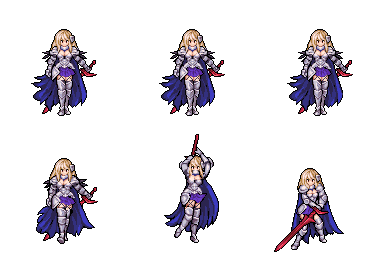
|
Elizabeth m |

|
Elizabeth |
Soul Hunters Rank Reward + Recruitment 16th - 200th 185 units awarded |
| 4★ | 
|
Anne m |

|
Anne |
Soul Hunters Rank Reward + Recruitment 201st - 700th Soul Hunters Vengeance Rank Reward + Recruitment 301st - 700th 900 units awarded |
| 4★ | 
|
Henry m |

|
Henry |
Soul Hunters 20,000 Spirit Shards Reward + Recruitment |
| 4★ | 
|
Mary m |

|
Mary |
Soul Hunters 10,000 Spirit Shards Reward + Recruitment |
| 6★ | 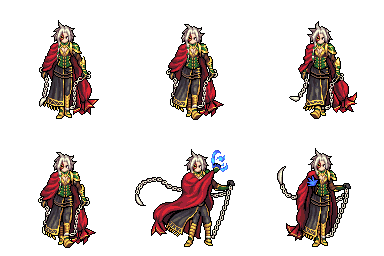
|
Loki m |

|
Loki |
The Halls of Valhalla Rank Reward + Recruitment 1st - 30th |
| 6★ | 
|
Fenrir m |

|
Fenrir |
The Halls of Valhalla Rank Reward + Recruitment 1st - 75th |
| 5★ | 
|
Sleipnir m |

|
Sleipnir |
The Halls of Valhalla Lap 1 Clear Reward + Recruitment |
| 4★ | 
|
Garm m |

|
Garm |
The Halls of Valhalla Random Lap 2+ Reward + Recruitment |
| 4★ | 
|
Hraesvelgr m |

|
Hraesvelgr |
The Halls of Valhalla Random Lap 2+ Reward + Recruitment |
| 4★ | 
|
Jormungand m |

|
Jormungand |
The Halls of Valhalla Random Lap 2+ Reward + Recruitment |
| 6★ | 
|
Grey m |

|
Grey |
Soul Hunters Vengeance Rank Reward + Recruitment 1st - 15th |
| 5★ | 
|
Oliver m |

|
Oliver |
Soul Hunters Vengeance Rank Reward + Recruitment 1st - 5th 16th - 200th 190 units awarded |
| 6★ | 
|
Isabelle m |

|
Isabelle |
Emerald Shadow Shakedown Rank Reward + Recruitment 1st - 25th |
| 5★ | 
|
Constance m |

|
Constance |
Emerald Shadow Shakedown Rank Reward + Recruitment 1st - 15th 26th - 200th 190 units awarded |
| 4★ | 
|
Adele m |

|
Adele |
Emerald Shadow Shakedown Rank Reward + Recruitment 1st - 10th 26th - 50th 201st - 700th 535 units awarded |
| 4★ | 
|
Hugues m |

|
Hugues |
Emerald Shadow Shakedown Rank Reward + Recruitment 1st - 5th 26th - 100th 201st - 500th 701st - 2,000th 1,680 units awarded |
| 4★ | 
|
Margot m |

|
Margot |
Emerald Shadow Shakedown + Recruitment |
| 6★ | 
|
Marjoram m |

|
Marjoram |
Mandragora March! Rank Reward + Recruitment 1st - 100th |
| 5★ | 
|
Agastache m |

|
Agastache |
Mandragora March! Rank Reward + Recruitment 1st - 30th 101st - 800th 670 units awarded |
| 4★ | 
|
Bergamot m |

|
Bergamot |
Mandragora March! Rank Reward + Recruitment 1st - 10th 101st - 500th 801st - 3000th 2,610 units awarded |
| 4★ | 
|
Fennel m |

|
Fennel |
Mandragora March! Rank Reward + Recruitment 1st 21st - 30th 101st - 300th 501st - 800th 3,001st - 7,000th 4,511 units awarded |
| 4★ | 
|
Rosemary m |

|
Rosemary |
Mandragora March! Rank Reward + Recruitment 1st - 20th 101st - 3,000th 2,920 units awarded |
| 7★ | 
|
Lilith m |

|
Lilith |
The Doomsday Tower Rank Reward + Recruitment 1st - 150th |
| 6★ | 
|
Eluit m |

|
Eluit |
The Doomsday Tower Rank Reward + Recruitment 1st - 300th |
| 5★ | 
|
Noir m |

|
Noir |
The Doomsday Tower Rank Reward + Recruitment 1st - 1,800th |
| 4★ | 
|
Amarelo m |

|
Amarelo |
The Doomsday Tower + Recruitment |
| 4★ | 
|
Viola m |

|
Viola |
The Doomsday Tower Rank Reward + Recruitment 1st - 60th 151st - 2,500th 2,410 units awarded |
| 4★ | 
|
Verde m |

|
Verde |
The Doomsday Tower Rank Reward + Recruitment 1st - 60th 151st - 500th 1,801st - 8,000th 6,610 units awarded |
| 7★ | 
|
Neolith m |

|
Neolith |
The Doomsday Tower Revelations Rank Reward + Recruitment 1st - 30th |
| 6★ | 
|
Azul m |

|
Azul |
The Doomsday Tower Revelations Rank Reward + Recruitment 1st - 20th 31st - 350th 340 units awarded |
| 6★ | 
|
Vermelho m |

|
Vermelho |
The Doomsday Tower Revelations The Demon Tower 150th Floor Reward + Recruitment |
| 5★ | 
|
Blanche m |

|
Blanche |
The Doomsday Tower Revelations Rank Reward + Recruitment 1st - 20th 101st - 200th 351st - 1000th 770 units awarded |
| 5★ | 
|
Pale m |

|
Pale |
The Doomsday Tower Revelations Tower of Light Lap 1 Clear Reward + Recruitment |
| 4★ | 
|
Paars m |

|
Paars |
The Doomsday Tower Revelations Random Lap 2+ Reward + Recruitment |
| 7★ | 
|
Merrow m |

|
Merrow |
Sea Paradise Rank Reward + Recruitment 1st - 60th |
| 6★ | 
|
Vertex m |

|
Vertex |
Sea Paradise Rank Reward + Recruitment 1st - 350th |
| 5★ | 
|
Dine m |

|
Dine |
Sea Paradise Rank Reward + Recruitment 1st - 40th 61st - 1,500th 1,480 units awarded |
| 4★ | 
|
Dauphin m |

|
Dauphin |
Sea Paradise Rank Reward + Recruitment 1,501st - 8,000th 6,500 units awarded |
| 4★ | 
|
Risacca m |

|
Risacca |
Sea Paradise Rank Reward + Recruitment 1st - 40th 61st - 200th 351st - 1,500th 1,330 units awarded |
| 7★ | 
|
Algeria m |

|
Algeria |
The Elder Tree Rank Reward + Recruitment 1st - 50th |
| 6★ | 
|
Trystis m |

|
Trystis |
The Elder Tree Rank Reward + Recruitment 1st - 350th |
| 5★ | 
|
Amor m |

|
Amor |
The Elder Tree Dream Tree Lap 1 Reward + Recruitment |
| 5★ | 
|
Arger m |

|
Arger |
The Elder Tree Rank Reward + Recruitment 1st - 30th 51st - 75th 101st - 2,000th 1,955 units awarded |
| 4★ | 
|
Haine m |

|
Haine |
The Elder Tree Sun / Dream Tree Random Lap 2+ Reward + Recruitment |
| 4★ | 
|
Placer m |

|
Placer |
The Elder Tree Sun / Dream Tree Random Lap 2+ Reward + Recruitment |
List of Recruitment Events
| Event Name | Start Date | End Date |
|---|---|---|
| Demon's Tower Recruitment | 9/7/2012 | 9/14/2012 |
| Black Dragon Recruitment | 10/5/2012 | 10/12/2012 |
| Nightmares Recruitment | 10/31/2012 | 11/7/2012 |
| Soul Hunters + Amazons Recruitment | 12/14/2012 | 12/17/2012 |
| Soul Hunters Vengeance Recruitment | 2/4/2013 | 2/7/2013 |
| Crimson Shadow Recruitment | 3/11/2013 | 3/19/2013 |
| Herbalist Recruitment | 5/7/2013 | 5/10/2013 |
| Demon Recruitment | 7/10/2013 | 7/12/2013 |
| Demon Recruitment Part 2 | 7/26/2013 | 7/??/2013 |
| Sea Paradise Recruitment | 9/11/2013 | 9/17/2013 |
| Halloween Fiesta Recruitment | 10/31/2013 | 11/12/2013 |
